Thursday, December 29, 2011

Back after holidays

Last week, I was having some issues with watering.  A few of the plants were bogged with water for a week after their last watering.  I'm not too sure what really happened, but these were some of the bigger plants so I was surprised they wouldn't be able to soak up the water, and I was even surprised the water didn't just evaporate out over that course of time.

Also, I saw a few plants growing extremely fast.  One of them was positioned just so that it had about one inch of clearance to grow, so I moved it to where it had about 3", thinking that it could stay there for a day or two before I find a good spot for it.  Later that day, the clearance was almost all gone, so I moved it to give it another few inches.  At the end of the day, I happened to look at it again and the clearance had been taken up again.

Because of these two factors, I scratched my plan to water them on Friday evening before leaving town for a few days.  At the start of the week, I had added some fertilizer to about half the plants, but not given them as much water as usual.

This is what I came home to last night:

I placed a hockey stick in the background, which is a little taller than 5'.  The plants are getting pretty close to maturity.

Impressive root growth.  (As always, click to see full size photo)

This was the last one I planted.  All of a sudden last week there were 5 shoots, and then this week, there is a little sixth one and these plants probably grew the most of any while I was gone the last few days.

I am hoping in the next week to plant some seeds for Venus Fly Trap and a banana plant.  I am also going to move a few of the lilies into 12" pots so they can expand a bit.  I was looking at a lot of the plants' containers and saw lots of good root growth.  Not all of them were quite as impressive as the one pictured above, but they were mostly in great shape. 

Sunday, December 18, 2011

Fertilizing

I have been thinking a lot this week about fertilizing the plants.  Using a sterile potting soil is great for keeping out pathogens that could harm the plants, but at the same time you're getting nutrient-deficient soil.  That is why you'll always read in the directions for caring for your plants that they require fertilizer frequently.

I'm thinking a lot about what you're getting with fertilizer, and I'm now really intent on going beyond the standard N-P-K solutions.  Later in the week, when the plants require their next watering I am going to add in a new fertilizer with micronutrients:  calcium, magnesium, manganese, copper, etc. that are required in small amounts to add various benefits to the plant structure.  In a natural setting, these elements are present in the soil structure and will be transferred to the plants by various microbes, provided the soil is healthy.  In a pot, the plants cannot access these micronutrients, so as these lilies grow bigger and bigger, I tend to believe it becomes more and more important to ensure they are getting a broad-spectrum fertilizer instead of just basic NPK.

I may take a few comparably-sized plants and run a test for a few weeks, giving one regular NPK fertilizer and the other plant a broad-spectrum fertilizer so that I can compare results to see if there is a difference. 

As a sidenote, I make a habit of throwing rusty nails, bolts and other junk metals into my compost pile.  As they are corroded away, iron, copper, and other beneficial elements will be introduced into the end-product as they are soaked up by bacteria and fungi that will ultimately make them available for plants.  Of course, introducing a variety of kitchen scraps and plant trimmings ensures other micronutrients like calcium, potassium and sulfur will be in the end-product compost.

Once I have things set up outside, I think I will be able to run a compost tea brewer that will provide me with fertilizer so that I'm not using up my wholesale fertilizer that I would like to keep in stock.

Thursday, December 15, 2011

Cover has arrived

Finally got my greenhouse cover delivered.  I got it from Northern Greenhouse Sales in Manitoba.  I'm really hapy with the speed and accuracy of executing my order, and I really like the support materials they sent and that are up on their website.  I would be working a lot harder to figure things out if it weren't for the easy access to information they provided for free.


That plastic band is not part of the packaging.  It is a roll of Cinchstrap--plastic lath to secure the cover to the frame.  It is very cost-effective and would save me a lot of time versus collecting, painting and fitting together scraps of wood to hold the cover down.

There are 3 rolls of poly in the box.  The one on top is the biggest, for the roof and rear wall.  Two others underneath are for the sides.


The poly cover is similar to a tarp, with some material differences to make it suitable for its purpose.  It is equipped with UV inhibitors to prevent wear from the sun, and is woven strong to prevent damage from birds, hail, ice, falling branches, etc.  It should last 5 years in a location like I am placing the greenhouse, and could last considerably longer if I either removed the cover for the summer or placed the greenhouse somewhere that it would get shade in the summer. 

I kind of like the idea of a controlled biosphere, to prevent a lot of wildlife activity around my plants, so I would probably not remove the cover for the summer.  On the other hand, I would consider lining the frame with a screen of chickenwire, snowfence, or something else in order to open it up for the summer.

From what I've read, I have an idea of how much of a temperature boost the cover will give me, with the quonset shape I am constructing.  Based on anecdotal readings, I should be able to achieve a temperature of about 25°C when outdoor temperature is freezing.  I do have concerns about whether or not the greenhouse is viable in February if temperatures are -20°, but only a few seeds need to be planted before March 1st anyways.  I may also introduce alternative heating to the greenhouse in January and February when it is really cold.  I haven't decided what the source will be.  I could take a risk with a small fire in my little patio fire cauldron, and I think it would probably work fine, or I could look to a heater.

I like this picture because it shows the new leaves opening up and I think the cannas have really interesting shapes to them as they grow.  These lilies give you something to look at long before they reach their mature size or the flowers begin to bloom.

These are my three best plants.  At the very left, you can see the leaf that was opening up on the picture above has now emerged most of the way, and is only curling at the bottom now.  And the other shoot from the same bulb is now half-opened.  The two pictures were taken about 3 days apart.  On the far right, I have a plant that is producing two great shoots and a new leaf should emerge sometime around the weekend.  The smaller shoot has a new leaf just creeping up so we'll see it opening up in about a week or so I suspect.  These plants are about one-third their mature size, minus the flowers that will sprout atop the leaves.

As for the lilies, the bulk of the plants that had small shoots have now opened their first leaves.  A couple of the plants that were first to grow, the ones that continued to grow through the shoots where they were cut down, have slowed down and are wilting.  I'm not really sure what this means, but I'm curious to see if new shoots will sprout up, if the plants will recover, or what is going to happen with them.

I'm still waiting on my second seed order.  I haven't gotten the seeds from Thompson-Morgan yet and hope to soon.  I'm also thinking of a third order, because I was looking through a third catalogue on the weekend where I was able to find some purple salvia and some mixed celosia that I really enjoyed planting last year.  Unfortunately I could only find salvia in red from Veseys and Thompson-Morgan, and only red and yellow celosia.  If I go ahead with ordering some trailing and climbing plants, I will order from Stokes and pick up the salvia and celosia as well.

Monday, December 5, 2011

Orders and Shipments

I completed my seed orders today for flowers.  Many seeds will be ready for planting within the next two weeks, and most of the others will be planted after New Year's.

I also received the first of my shipments in for the greenhouse.  My Vesey's order came in this morning with a lot of seed packets, the automatic vents for the greenhouse, and some seed trays.  Unfortunately, I don't think the seed trays will be versatile enough to work with the majority of the seeds.  They should be good for a lot of the vegetables, and a few of my perennials such as the hostas and daylilies.  I purchased them because they were the most cost-effective, and I wanted to see how versatile they would be.  Unfortunately I will have to buy bigger trays to grow most of the flowers and first-planted vegetables.

My second order was with Thompson Morgan, where I was able to pick up more exotic plants and supplant whatever standards that I wasn't able to find at Vesey's.

I also have to pick up my door for the greenhouse and am waiting on delivery of the covering.  The covering may have arrived already as I missed a delivery from Canada Post this morning, but I have an Ebay order also coming soon, so I'm not sure which one I will be getting tomorrow.

Final note on seeds:  I may be getting some more flowers, namely climbing and trailing vines.  The demand for vines in the past hasn't been huge.  I have planted a number of standard perennial vines like Honeysuckle, but haven't had many requests, nor suggested vines often.  I'm considering picking up a few and maybe testing the waters next Spring to see if anyone is interested.  As for trailing plants, I figure they might come in handy if I try to sell some of the exotic plants in planters.  I am also looking into planting bags, similar to the way the Topsy-Turvy vegetable/berry planters work, that can be used to hang off deck railings, fences, etc. where trailing annuals would be useful.  Again, because I don't have a history of selling container plants, I'm not sure how much interest I would get.  Based on the containers I see, I suspect it is worth the gamble of picking up some of these plants.

Sunday, December 4, 2011

Greenhouse Supplies and Flower Seeds

I have gone ahead and ordered the covering for the greenhouse and the automatic, temperature-activated pistons that will open and close my vents.  Initially, when I considered a greenhouse, I was really worried about having to bundle up in the middle of January and February and trudge through snow to go out and open and close vents, and also about problems that could arise if I wanted to get out of town for 2-3 days with the prospect of overheating.  These pistons should make this project a much less stressful endeavor.

As for plants, I ordered about 35 different seed packages of popular annual flowers and a few biennials and perennials.  One of the issues that gave me problems was the number of changes I made to the order from my rough draft.  I had a number of automatic flowers to order just based on what I know are in high demand every year:  begonias, geraniums, impatiens, portulacas, coleus, and a few others.  But I need to have a wide variety of plants to suit different people's preferences and since I don't read minds, it took a lot of effort to really make sure there was a good deal of variety in the order.  There is also an inclination to order lots of fancy stuff that people might not be used to seeing.  I did pick up a number of interesting plants, but it's important to remember I already have a pretty good handle on the basic flowers from years of experience working with them, there's no need to complicate things for myself trying to become an expert on exotic plants.

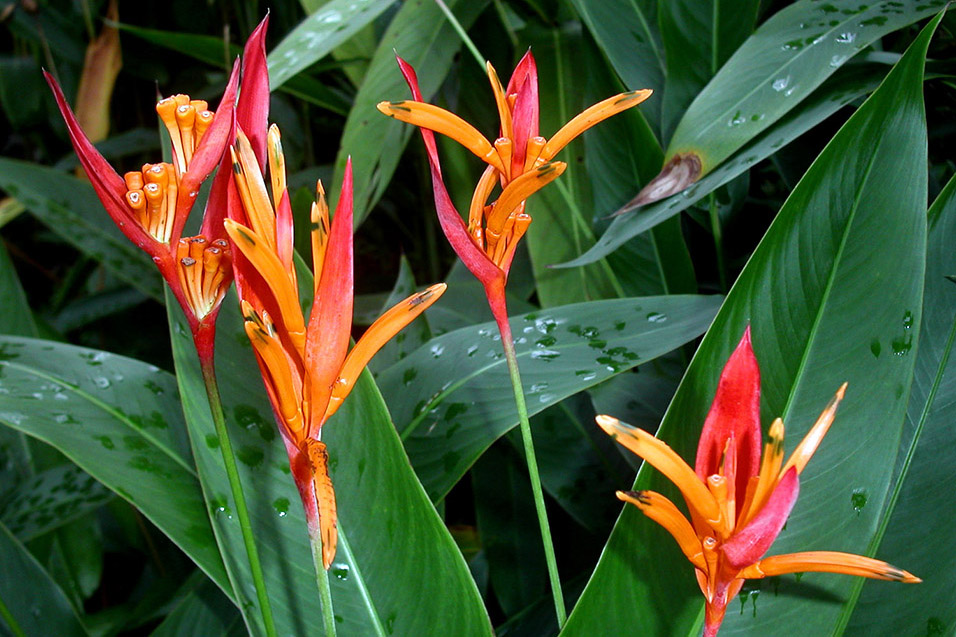
I am planning to make an order of some interesting tropical plants like Birds of Paradise and banana plants, but mainly for container use on a small scale.
Birds of Paradise
Black Elephant Ear

It's hard to believe, but a lot of these annuals will need to be planted in a couple weeks around the holidays.  In order for them to be looking good and ready for transplanting by Mother's Day or May 24 weekend, mid-December to mid-January is standard planting time.

Vegetables are planted in March to April, so luckily I don't have to worry about them just yet.

Three Leaves & Three Shoots

This week was particularly rough on the lilies.  Since I posted last weekend, only Monday was reasonably sunny and the plants didn't shoot up too much.  I do have a few prizewinners and a few runts.
This is the bathroom lily which was close to touching the ceiling last weekend.  It was pushing against the ceiling when I got home Friday afternoon, so now it is sitting on the floor.

These are the lilies I separated from the big container where they were all crammed together.  the one on the left is the first to open three leaves, which it did Friday evening.

The bottom container has one of the more interesting bulbs, even though there is under 6" of growth.  You can see that the bulb is sprouting three shoots.  They are closely packed together, so I would be surprised if I don't cut one off later in order to let it grow and start a new bulb.

This is a close-up of the cluster of shoots.

This is the other one that is sending up three sprouts.  These are a little better spaced, and I hope they can call grow tall in one cluster.

My new group of bathroom lilies.


You can see I have a handful of good plants as well as some that are barely sprouting.  I have moved three big ones to the bottom shelf.  The one on the left was pressing against the ceiling when I went to check on them this morning.  The other two big ones came off the second shelf.  I figured they are tall enough to catch sunlight from the lower shelf, so I put the struggling plants on the middle and top shelves where they will get better exposure.

I did not bother to snap a picture of the other shelf unti beside this one.  All the lilies there are 6" sprouts or less.  Certainly some healthy looking plants among them, and a few that haven't shot up at all.  I think if the forecast holds up and we get a few sunny days this week, we'll see good growth.

Lastly, I have put a couple rose cuttings into the containers on top just to see what would happen.  I haven't taken any effort to care for them, other than to give the lilies in the containers water.  One of them looks moderately healthy, but that doesn't mean much.
My routine for care is basically to spritz the leaves with water once every couple days, especially if I expect sunlight, and to give them about 1" of water every week, and a little top-up during the week for some of the bigger ones.  As of now, I am alternating between fertilizer and plain water.  I fertilized when I planted and again this weekend; last weekend I just gave them clear water.  The roots are looking good.  I have pulled out a few of the containers to look for roots pressing against the clear plastic.  In a lot of cases, I'm seeing that the roots are dominating the space and that bodes well for continued growth.  Again, if we can get some good rays this week, I expect to see a surge in many of the plants.

Monday, November 28, 2011

Worms

I cleared out the bunch of lilies today into separate containers.  The big container had 8 shoots, plus a little tiny one popping up, so I was a little surprised to realize that there were 14 total bulbs crammed in there.  Interestingly enough, I had noticed that all the water had been sucked dry from the container since I planted the bulbs a little over one week ago.  It really made me think about the watering needs of these plants.  Usually when you think of tropical plants, you think about the heat, but they are also acclimatized to sucking up as much water as they can get.

When I pulled one of the plants out to transplant it, I noticed there was some riff-raff.

A few worms hanging out in the soil.  Bad picture because of all the moisture affecting the flash.

Better picture once I dropped the bulb into a tote of dry peat.

As soon as I saw the worms, I suddenly remembered that when I was planting the bulbs originally into the big container, one of them had a lot of soil clumped around it and I had spotted a worm digging around in there.  I figured I would leave it be, it is only going to help my plant with nutrient-rich vermicompost.  So when I spotted at least a handful of worms in the soil, I have to say I was pretty impressed with the rate of reproduction.  I've read a little about worms and needless to say, those 5 worms are now breeding an army large enough to kill us all.  Until they get uppity and start trying to escape their container, I'll leave them be.  Maybe I'll start a worm bin for them; I decided to throw a few brussel sprout leaves and peanut shells on top of the soil in the two containers where most of those worms ended up.  They should poke up some night to pull them down to munch on. 

While I was at it, I couldn't resist snapping a couple more photos of some of these roots.

Those roots are massive, no wonder the water was all gone in the container!

This is a different bulb, with a handful of impressive roots.  It's not only the length, but these are firm, tough, thick roots compared to what I was seeing when I first planted them.  Also, I wanted a picture of this bulb because it shows a brand new part of the bulb that has expanded from the main section and a new shoot that is just beginning to break through the soil and emerge toward the sun.
As I said, it was 14 bulbs, 14 containers.  I'm a little concerned about how to make room in front of the window for all of them.  It looks like the "bathroom lilies" will be getting at least one roommate, and maybe I'll get a shelf up in my office at the window.  And thankfully, I took a quick glance through the Home Depot flyer this morning, where I spotted shoebox containers for only $0.67 each, so I picked up 20.  I may just go back tomorrow to snatch up 20 more while they're on sale.

UPDATE:  The large bathroom lily has already, in just 36 hours, taken up half the space left to the ceiling.  It grew about 2-3" and has maybe 2" left until it hits the ceiling.  Actually, because it was bleak weather on Saturday, and beyond bleak today, the leaves haven't really gotten as much sun as they would like and are a little wilted and slumping.  I wouldn't be surprised if an hour or so of good sunlight has the big lily pressing the ceiling tomorrow morning--that is, assuming we get a little sun.

Saturday, November 26, 2011

Cool stuff happening

In the pasty week, the 6-8" cannas have either opened up leaves from the shoots, opened up a second leaf, or are in the process of multiple leaves.


"The bathroom lilies":  last week, the big one was just a 6" shoot with a little leaf on the top.  For most of the week, I watched the shoot climb about 1" every day, then it opened up on Friday when it was a warm, sunny day.  Also, the smaller ones on the right are improving.

I thought I would include this just to get a good image of the containers.
These lilies are also improving from the 6-8" that they were last week.  you can see the one in the middle is really pushing forward with the second leaf, as is the one in front of it and the one off to the side.  Kind of hidden is one in the back corner that is also opening up another leaf, and there are little shoots advancing from some of the roots that were not there last week.  
You might notice I have no pictures of the big blue tote bins that also had bulbs.  I finally decided to get rid of the totes and move those lilies into the shoebox-sized clear containers like the others.  I was just worried the totes were too tall to allow the proper amount of sunlight in.  I picked up two dozen containers last night to transplant them this morning.  Getting a look at the roots was very interesting.

This is one of the tote plants that I transplanted.  I wanted to get a picture of the root system.  Believe me, when I pulled these out of the ground, they looked nothing like this! 
I was getting the bulbs from heavy, damp clay soil and the little roots were mostly snapped or sheared off the bulb when I brought them home.  Typically, the plants would have 1-2 little roots, only 2-3" long at best.  The roots here are about 4-5" long and you can also see little tiny thin strands of rootlets that are growing extensive structures from the bulb.  (You can click on the pictures to enlarge).

In fact, I wish I hadn't run out of memory on my camera, because after this plant, I transplanted 2 or 3 that had roots extending between 12-18", multiple roots each.  With most of the bulbs, little shoots were forming and starting to sprout upward.  They were not pressing through the soil yet in the totes, but I suspect they will be shooting upwards from their new containers within the week.  The way the roots had grown, I'm a little skeptical now that I ever needed to abandon my tote bins at all, but I do find the clear shoebox bins to be much easier to handle and observe.

Speaking of transplanting, I'll divulge my planting method here:

First, I pour a little bit of water along the bottom of the container.  Usually a bit less than 1" is plenty.

Now I cover the water with 1-3" of soil.  The shape of the root and the root structure will determine how much soil is required.  I am using peat moss here, which is very light.  It will allow the roots to spread easily through it.  Peat is very interesting because it doesn't readily absorb water, so it kind of floats on top.  I check to make sure I have the right amount of peat down before putting the bulb in, so I push down on the peat, and it feels like I'm pressing against a tiny waterbed.  On the other hand, once peat absorbs water, it retains it for a long, long time.  The easiest way to wet peat, and the method I use to water the plants and seeds, is to just spray the containers with mist

Now that the peat is ready, I plop the bulb on top.  You can see some lengthy roots here; I'm going to press those into the peat, down to the water.  The bulb itself I want to remain pretty dry sitting on top of the peat.  The final step is to cover it with peat.  This is kind of a tricky science to know exactly how much you want to cover the bulb.  Generally, bring the soil level even with the top of the bulb, then brush the bulb clean and leave only the thinnest layer over top of the bulb.  Cannas typically grow right along the surface of the soil.  With other plants, I would probably be applying a thicker cover.
As for a few final notes:

The frame for the greenhouse should be completed today.  I then need to check measurements and then order the covering.  Coming from Manitoba, hopefully I will have it next week.

My seeds are not sprouting as of yet.  Hopefully I see some action soon.

I need to go pick up another dozen containers.  The container with the bunch of lilies sprouting is getting way too crowded for my liking.  I'm kind of surprised this day has come so soon, but I always knew I would need to transplant them.  I am probably going to keep the biggest bulb in the container and see if, through the course of the full winter, the canna will expand enough to take up the whole space.  As for those totes, I hope they will become useful for the same purpose.  I would really like to have a few gigantic roots.

Monday, November 21, 2011

Some seeds while I'm at it

I figured since I was doing all this work with the lilies indoors I might start up a tray of various seeds I have amassed this fall, just as a small experiment before the hard work comes later.

I have hostas, canna lilies, ricinus/castor oil plant, daylilies and asiatic lilies.

In the case of some of the seeds, the shells are very hard.  Canna lily seeds are used for jewelry as beads in some cultures.  They are round, shiny, black and tough as any seed I've ever handled, and I didn't have the patience to try sanding down the edge.  So with that in mind, I wouldn't be surprised if it takes 2-3 weeks to see sprouting from some of these cells.  With the hostas, which are easy to rupture and split, I am hoping to see progress in much less time.

Speaking of seeds, I have also been browsing the catalogs in preparation for making a big order.  Not many tough decisions as far as the vegetables go, but I am on the fence about a number of annuals that I may or may not wish to grow.  Until the greenhouse is up and I am able to determine the amount of planting space I will actually have, I cannot proceed with any orders.  The angle of the sun vs. the angle of refraction of the light will determine how high and how deep I can plant.  Looking forward to solving that riddle.

Sunday, November 20, 2011

Wow!

These lilies are bursting out and soaking up the sun and water! 

I wish I had taken a picture when I transplanted a number of the bulbs today from inferior pots to the newer shoebox containers I picked up this weekend.  When I originally planted the bulbs, the little offshoot roots were few and far between in most cases, and were not sending out little rootlets of their own into the soil.  This may have been partly due to the fact that smaller, weaker roots would have been damaged when the lilies were initially pulled from the soil, or because these plants were pulled from a garden with heavy clay soil where small roots might have a tougher time establishing themselves to begin with.  In any case, I was blown away with the vibrant root systems I saw when I was getting the new containers prepared.


The picture is a little fuzzy, but you can see significant growth out of the stalks, 6" for most, up to 12" for one.

These ones started out in my kitchen, sitting in the corner near an east-facing window that doesn't catch direct light, and across the room from a north-facing window that catches ambient light from outside.  They were also in pots that were very tall and shrouded them away from a lot of light as well.  I was pleasantly surprised to see how they thrived in those substandard conditions for about one week.  Now they sit next to a south-facing window in better containers.
You can spot a few little ones popping up from roots where I had completely removed the stalk. 
I added some fertilizer to the water today, so the plants that are crammed into the big containers may need to be moved soon into larger single pots at the rate they are going.  I'm already adjusting the shelving unit to allow for more height, so I look forward to what they might look like in another week.

(416)679-8465   |   ParadiseLawnAndSnow@yahoo.ca

Wednesday, November 16, 2011

In the meantime...

I'm preoccupied with other things, like wrapping up our summer season and preparing for the winter, so I haven't gotten my materials ordered or picked up.  In the meantime, there is some work to do for the greenhouse project.

I am still cleaning and storing some seeds away, but most importantly I am caring for tropical plants indoors until the greenhouse is ready.  Having collected a number of canna lily bulbs, I have started the plants indoors before they move into their new home.  Ideally, I would have preferred to have just stored the bulbs until I was ready to plant in the greenhouse, but I was worried about making a mistake when it comes to proper moisture, aeration, etc. when storing them.  But my house could use some lively colour anyways, and it's nice to get something started with the greenhouse project right away.

All I did was grab some old shelving units, peat moss and planting pots from the shed, pick up some storage boxes to act as the containers, and get the lilies planted and placed on the shelves sitting against the south-facing window in the extra bedroom in the house.
The lilies are planted into pots.  The pots sit inside the bins, which are filled with about one inch of water.
I'm not expecting many of the stalks to necessarily survive.  Some of the lilies are growing by extending new shoots up through the middle of the old stalks, but most of them seem to be closing off where they were cut, and will probably send up new sprouts.  This might actually help the plant to grow a thicker, larger root structure, which will allow it to grow more shoots, and thus give me more plants.  We'll have to wait to find out.

(416)670-8465   |   ParadiseLawnAndSnow@yahoo.ca

Friday, November 11, 2011

Starting a greenhouse

Last year, I studied up on the basics of harvesting and propagating seeds with the idea of maybe growing a few plants to source some of our landscaping projects.  Once I dipped my toe into the water, I quickly decided it would be more fun to dive right in and look into a greenhouse operation.  After many blueprints and cost estimates, I have finally committed to moving forward with the idea.

This will serve as a journal of my greenhouse activities as I look to expand my business, learn the ropes of plant production, and surely make countless stupid mistakes as I go.

(416)670-8465   |   ParadiseLawnAndSnow@yahoo.ca